Vertec Configurator
Preconfigure your Vertec with Vertec Configurator
Operating mode
Base module
Additional modules
With the Vertec Configurator, Vertec can be preconfigured in all full-featured apps.
The configurator provides an overview of the functional domains in Vertec and the modules required. It clearly shows all information about country- and industry-specific additional features, and enables you to configure Vertec according to your individual needs (incl. price calculation).
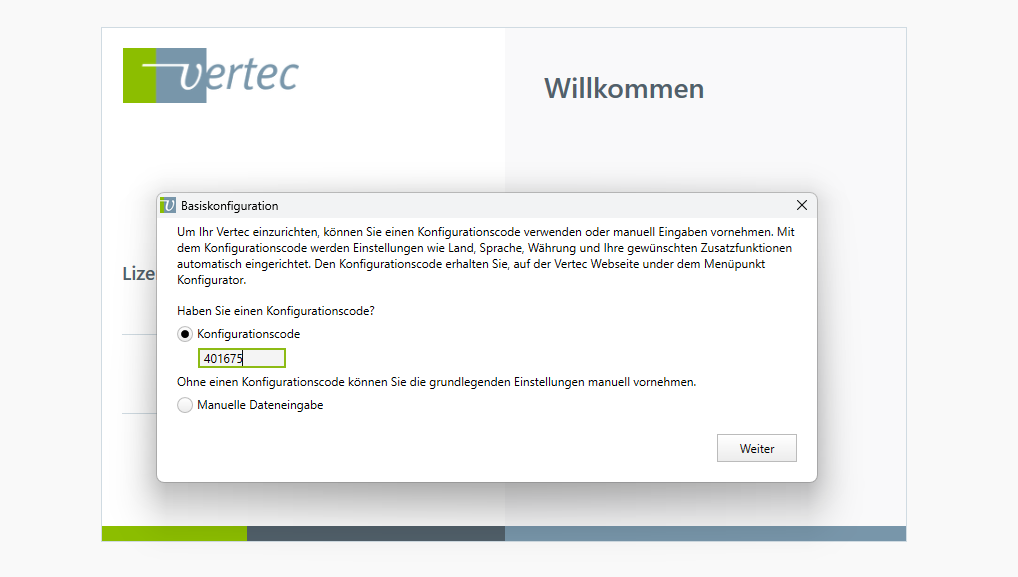
It is possible to generate a configuration code with the configurator. This enables you to start Vertec with an empty database and enter the configuration code, which applies the pre-configured information such as country, industry, feature set and additional features (e.g. after a 30-day test).
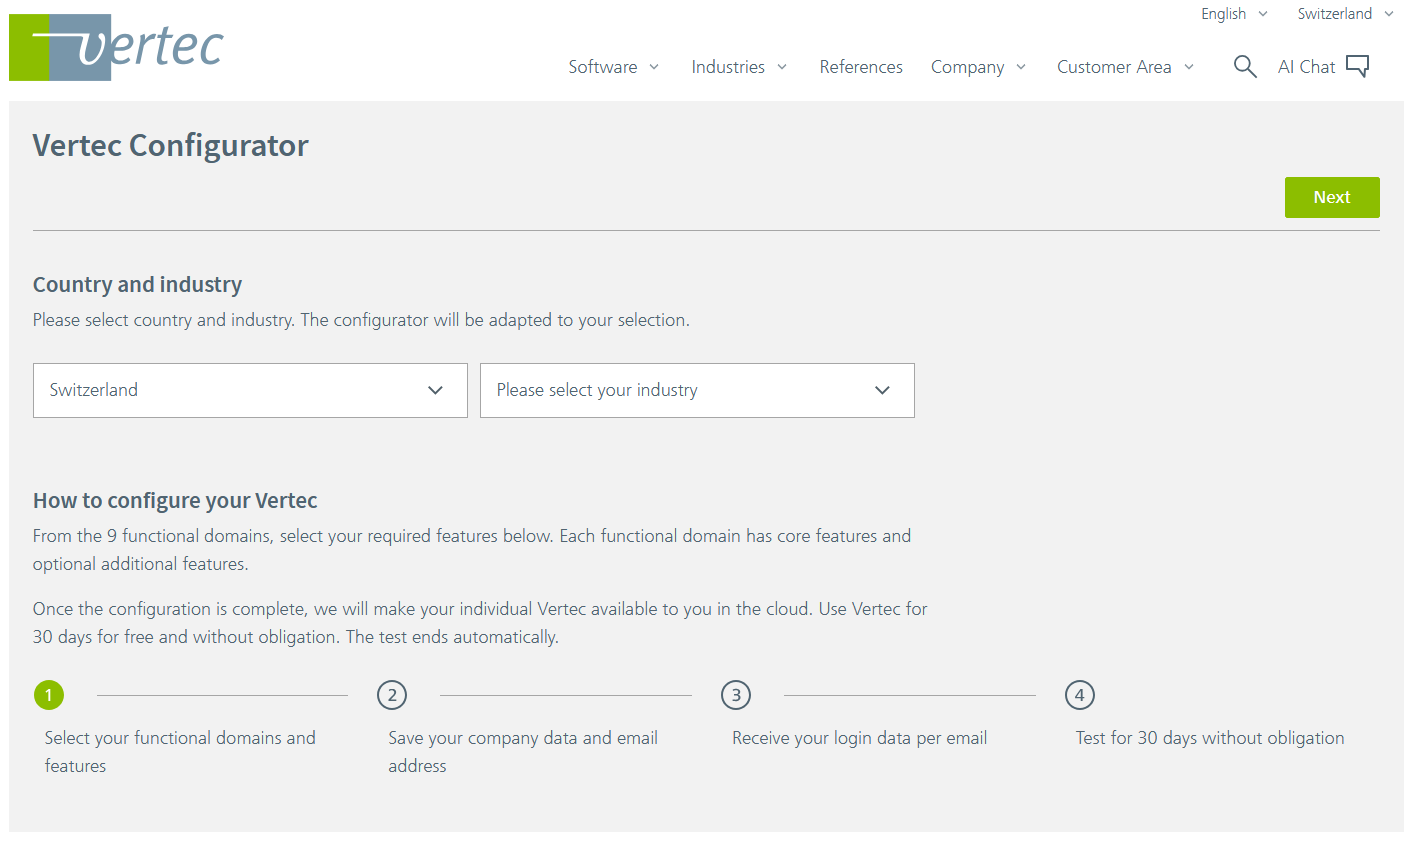
First, select the country and industry and click on the Next button on the top right.
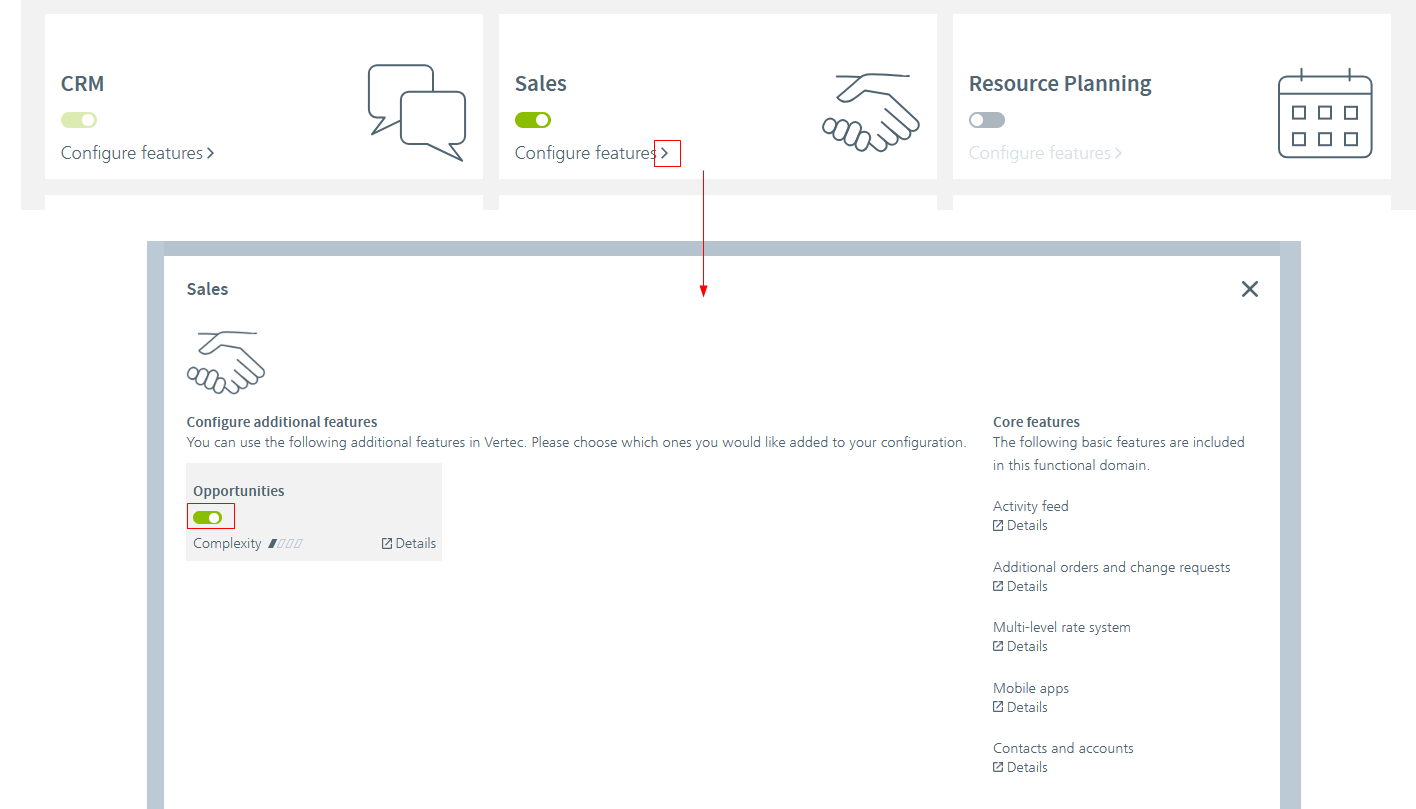
Now define your feature set by selecting the functional domains that you want to cover with Vertec. For each functional domain, you can add further options in the form of additional features via Configure features >.
Activating the Use demo data option, creates sample data such as projects, users, services, expenses or invoices. You can delete this data at any time by executing the script demodata_delete_all_data, which you can find in your Vertec installation under Settings > Reports & Scripts > Scripts.

For example, you can add the opportunities additional feature for sales:
The last step shows an overview of the configuration you have put together. Below the overview, under Price details, you can also calculate the price for this installation.
- If the configurator was started via a 30-day test, the overview looks like this:
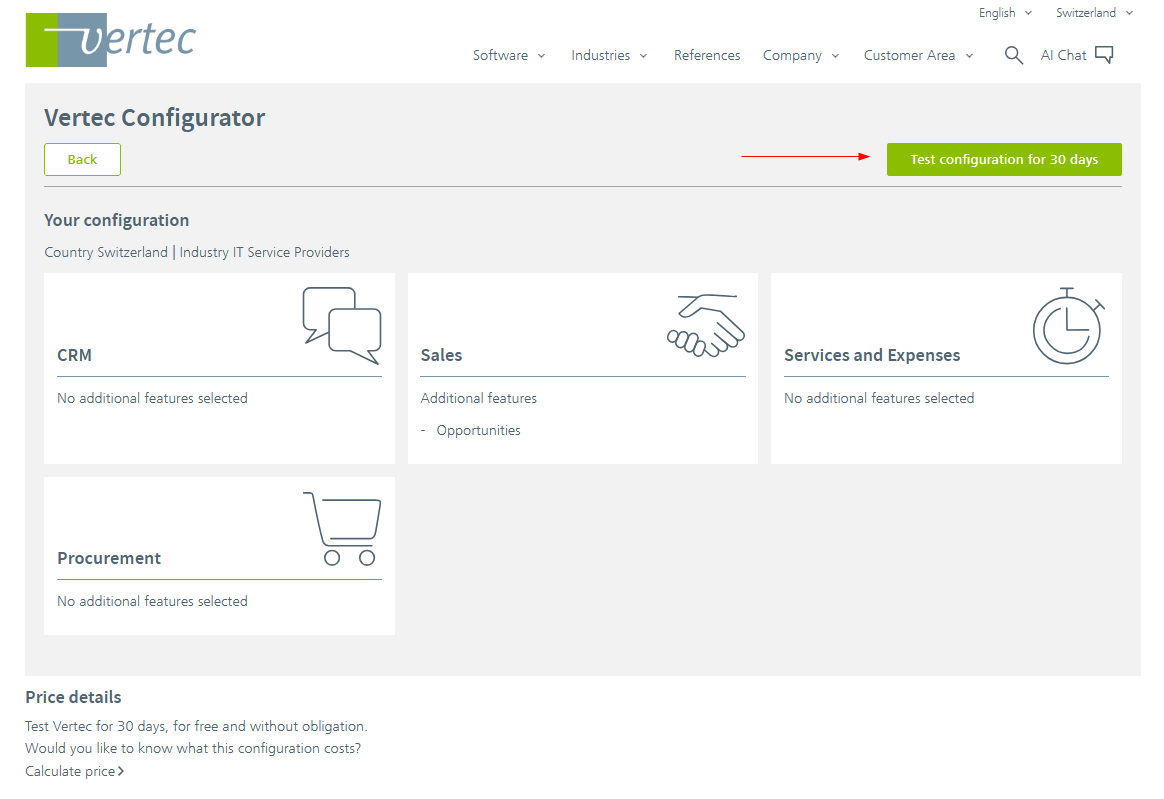
Clicking on the Test configuration for 30 days button takes you directly to the 30-day test in the Customer Portal. Your compiled features are automatically taken over into this test version. After registration, you get access to your Vertec test instance, which automatically applies over the compiled features.
- If the configurator was started without a test, a code is specified above the overview.
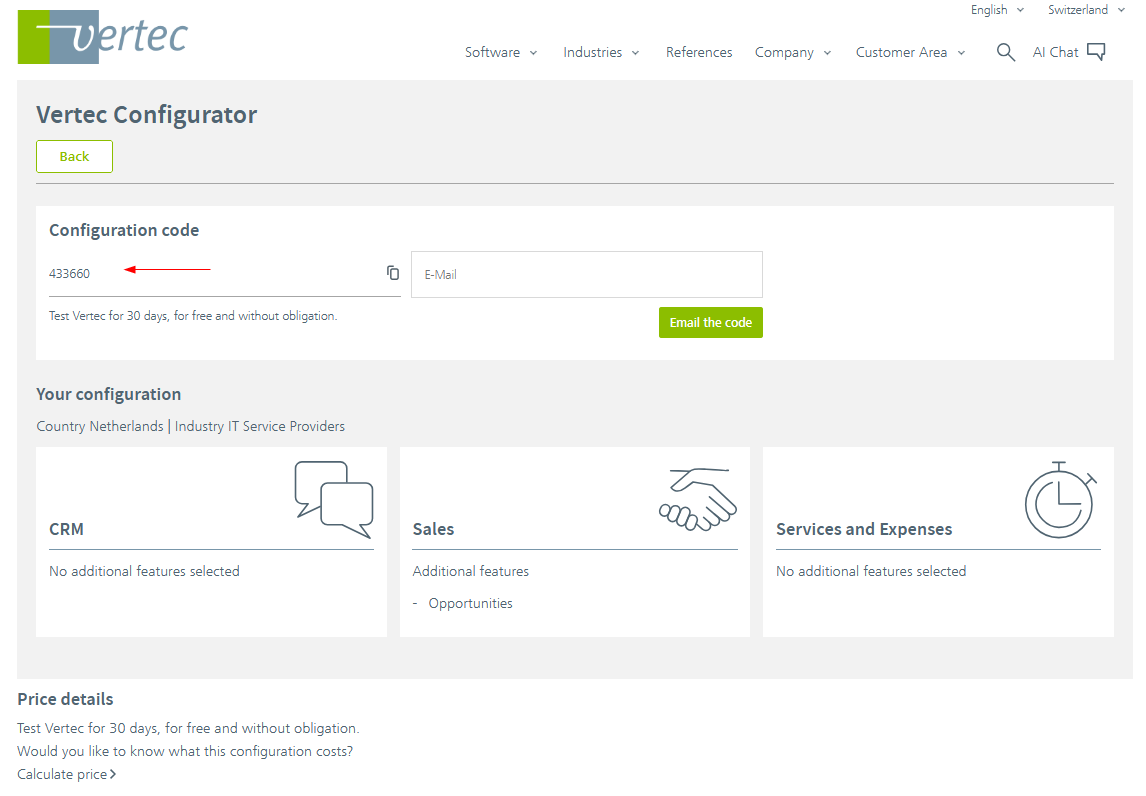
You can copy this configuration code here and enter it directly in your Vertec installation, or email it to yourself for later use. The code saves your pre-configured selection and automatically applies it to your Vertec: